Bring customers, suppliers and other external stakeholders into your business processes. Build a form right in Power Automate or Azure Logic Apps, share a link, and put their responses to work.
Add App Power Forms to your favorites using the star, so it’s easier to find next time.
2
Build and share your form
Add the Create new App Power Easy form action, then add your fields with Add new field to App Power Easy form. Send the returned form URL to your recipient.
YOUR FORM, YOUR FLOW Define fields directly in the flow designer.
3
Put the response to work
Use Wait for form response, or start a separate flow with the When form is submitted trigger. Process the submitted values in your own business systems.
Follow the step-by-step guide in the new designer +
Follow along in the newer Power Automate designer. This example collects contact details and passes the response back to the flow. Select any screenshot to see it at a larger size.
CONNECT APP POWER FORMS
Get your key and create a connection
Start by requesting a trial API key and checking your email, or use your production API key. Create an App Power Forms connection in Power Automate using that key.
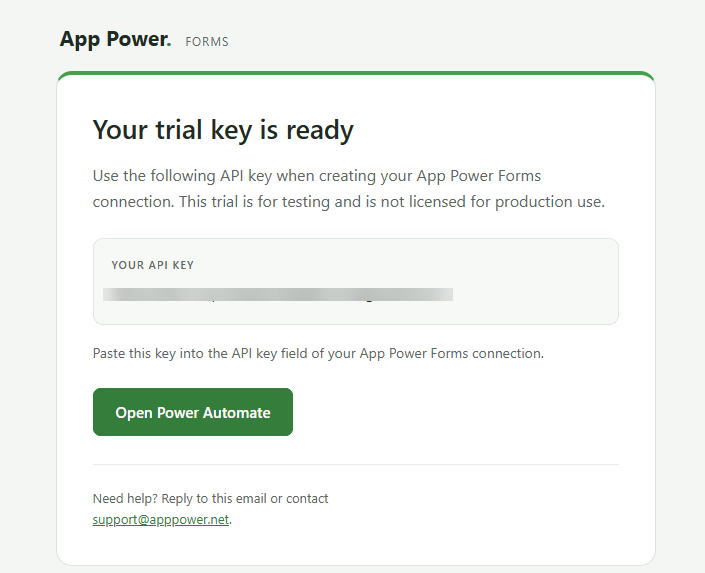
1. Check your email for the trial key
Copy the key from the “Your trial key is ready” email. Check your spam or junk folder too. If you find the email there, mark it as “Not spam” or “Not junk”.
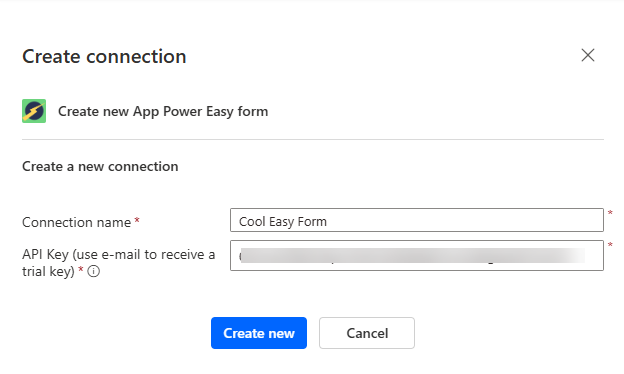
Click to enlarge ↗2. Create your connection
Give the connection a name, paste your key into the API Key field and select Create new. Then continue configuring your form.
Click to enlarge ↗
FIND THE CONNECTOR
Add App Power Forms to your flow
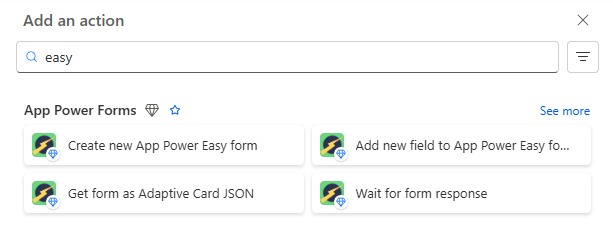
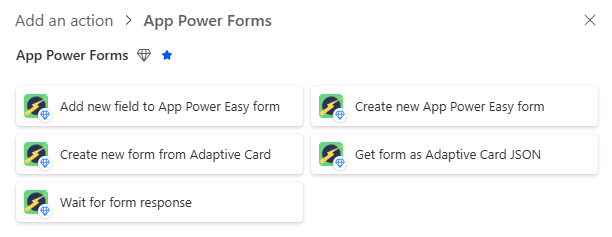
In your flow, choose Add an action and search for easy or app power easy. Select App Power Forms to see the available actions.
Search for “easy” to find the connector. Click to enlarge ↗
CREATE YOUR FORM
Choose the form creation action
Select Create new App Power Easy form and use the connection you created in the first step. Give your form a name. The connector also offers actions for adding fields and waiting for the response.
Choose the action inside the App Power Forms connector. Click to enlarge ↗
DEFINE THE FIELDS
Add the details you need
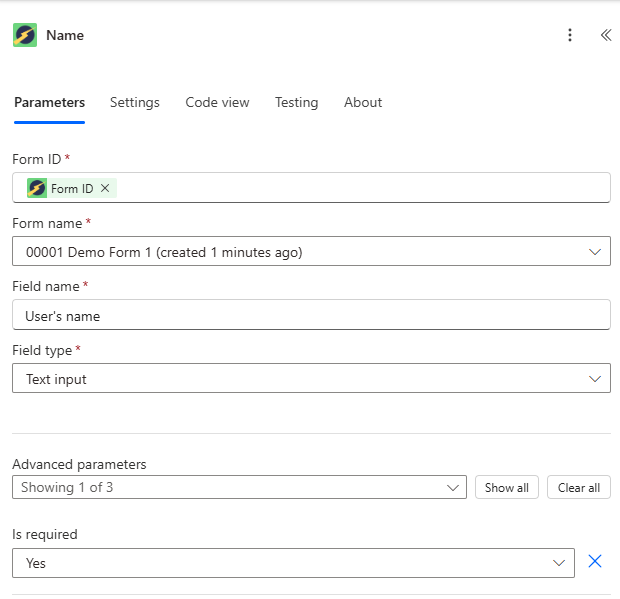
Add an Add new field to App Power Easy form action for each field. Use the Form ID returned by the form creation action and select your form’s name.
In this example, the first field is User’s name, its type is Text input, and Is required is set to Yes. Add the remaining fields in the order you want them to appear.
Configure each field directly in your flow. Click to enlarge ↗
CONNECT THE STEPS
Wait for the response and continue
Share the form URL returned by the form creation action with your recipient. Add Wait for form response to use the submitted values in the following steps.
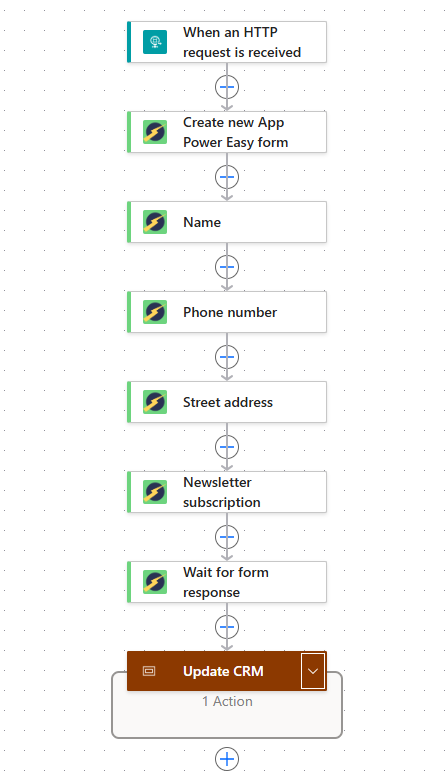
The example flow creates the form, adds four fields, waits for the response, and then continues to an Update CRM stage. Replace that stage with the actions your own business process needs.
Alternatively, use When form is submitted to handle responses in a separate flow.
The complete example, from creating the form to processing its response. Click to enlarge ↗
SEE WHAT YOUR RECIPIENT SEES
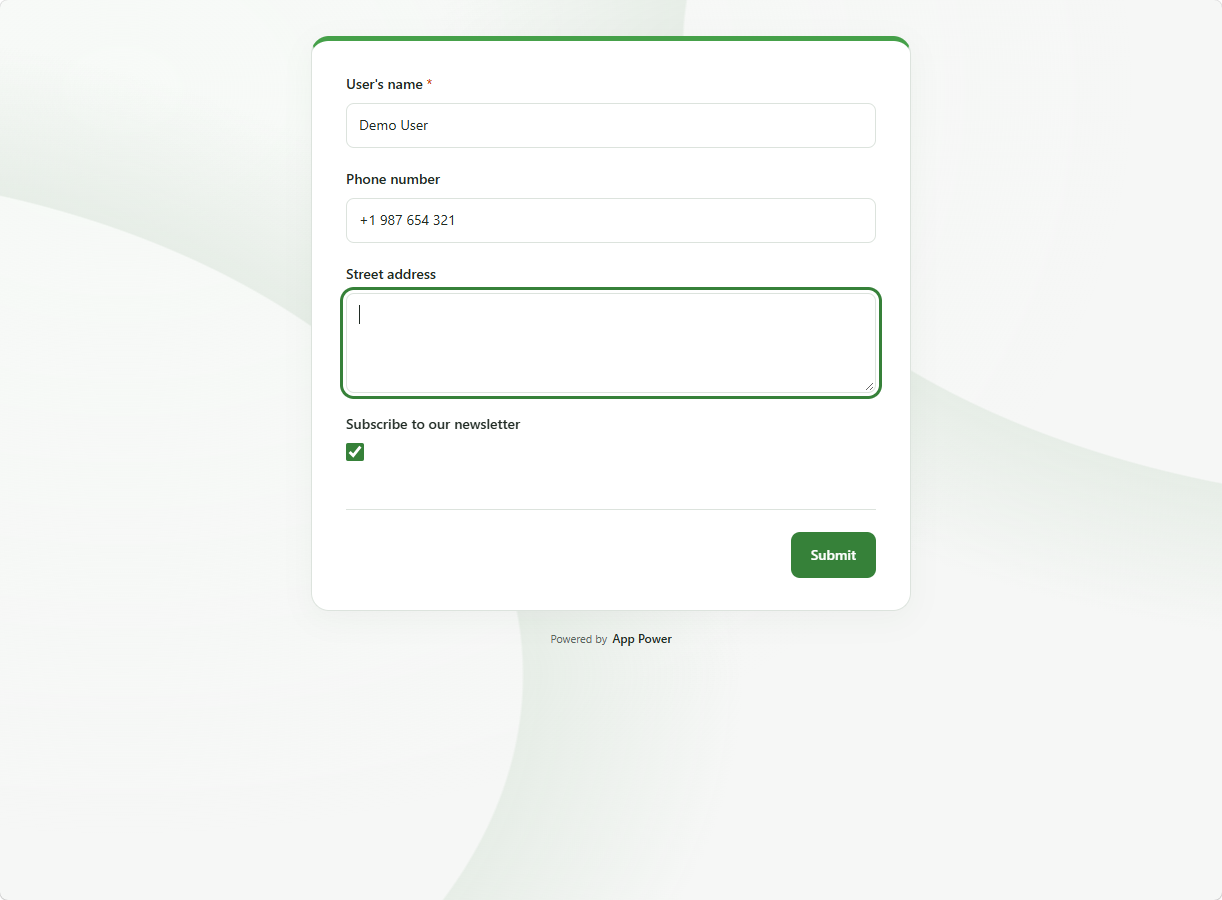
A form ready to share
The form contains the fields defined in the flow: a required name, a phone number, a street address and a newsletter subscription checkbox.
Test with example data before putting your workflow into production. Retrieve the responses into your own workflow and keep independent copies where needed.
Get a trial key by email and explore App Power Forms in your own workflow. Trial licenses are for testing; choose a monthly subscription when you’re ready for production.
By purchasing, you agree to the Terms and Conditions. For businesses and organizations only.
Prices exclude VAT. Applicable VAT is calculated at checkout.
Buying with or without a VAT ID
Have a VAT ID? Select "I'm providing a tax ID" in Checkout and enter it before paying. If your business has no VAT ID, you can still purchase. We may email you to confirm your business details; this invoice review does not delay your license.
Enter your email address on the trial request form. Your key is delivered by email. Check your spam or junk folder too, and mark the message as “Not spam” if it ended up there.
Can I use Adaptive Cards too?
Yes. Alongside Easy Forms, the connector includes a Create new form from Adaptive Card action. The connector guide describes the available actions and field types.
How do I manage my subscription?
Open Manage subscription to view invoices, update your payment method or cancel through Stripe. If you cancel, your subscription remains active until the end of the current paid billing period.
Cookies & privacy
We only use necessary storage to remember this notice for six months. This website does not use analytics or advertising cookies. Privacy policy